
Regular cooling system maintenance achieves optimal performance and longevity of your vehicle’s engine. Furthermore, it ensures that the cooling system operates efficiently and effectively.
Hence, preventing potential issues down the road. Engine temperature regulation plays a vital role in enhancing overall engine performance thanks to a well-maintained cooling system.
Maintenance involves taking care of key cooling system components responsible for circulating coolant throughout the engine. For example, the water pump.
To keep the water pump functioning optimally and extend its lifespan you need regular maintenance. This will include flushing and refilling with distilled water and coolant (antifreeze).
Neglecting this essential car service can lead to overheating, corrosion, and potential damage to other engine components. Recognizing common signs of cooling system issues is equally important.
For example, coolant leaks, overheating engine, or a sudden drop in coolant levels. Addressing these warning signs promptly can prevent costly repairs while ensuring your vehicle remains reliable.
How to check coolant levels guide.
Optimal performance of your vehicle depends on several things inclusive of proper maintenance of your cooling system. Regularly checking the coolant levels is an essential aspect of this maintenance.
Ensure that your coolant levels are always at an appropriate level. Following these step-by-step instructions to achieve this.
Step-by-step instructions for checking coolant levels.
Park your vehicle on a level surface and turn off the engine. If you’re from a drive, allow the engine to cool down first before continuing.
Locate the coolant reservoir under the car hood. It is usually a translucent plastic tank with high and low markings on it.
It’s usually located either on the left or right side of the engine. You will find it at the back side of the engine near the windshield.
Check the coolant level against the markings on the reservoir. Since the antifreeze is usually colored, it’s easier to spot its level inside the reservoir.
If the level is below the “low” or “minimum” mark, it indicates that you need to add more coolant. Top up the low coolant up to a desired level but don’t exceed the “maximum” mark.
Importance of maintaining proper coolant levels.
Since low coolant levels cause overheating and engine power loss, it’s important to maintain the appropriate levels. Maintaining adequate coolant levels in your cooling system is vital for several reasons:
- Preserves engine performance.
The right amount of coolant allows your engine to function optimally by providing heat dissipation and lubrication. This reduces wear and tear on its parts for a longer lifespan.
- Protects against corrosion.
Proper coolant levels ensure that internal components are adequately protected against rust and corrosion.
- Next
- Prevents overheating.
Coolant helps regulate engine temperature by maintaining the right operation temperature level. The heat dissipation coolant mechanism prevents the engine from overheating during operation.
Inspecting cooling system components.
Ensure optimal cooling performance and prevent potential issues by performing Regular inspection of cooling system components.
Signs of wear or damage can be detected early when you pay attention to key components. Because it allows for timely action to avoid costly repairs.
Let’s explore the essential elements that should be inspected and their role in maintaining the cooling system’s efficiency.
1. Coolant.
Firstly, checking the coolant level involves ensuring that it is at the appropriate level. Additionally, checking coolant also involves its condition to ensure that it’s free from contaminants.
Overheating is caused by low coolant levels since this insufficiency causes it not to reach all engine parts. Additionally, contaminated coolant affects its ability to dissipate heat effectively.
Hence leading to overheating as well. Regular inspection is a preventive maintenance activity that can prevent this from happening.
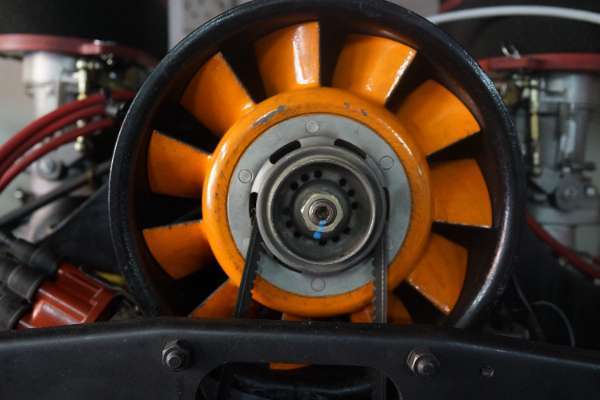
2. Radiator.
The radiator is a cooling system component responsible for the heat exchange feature of the cooling system. Hot coolant flows into the radiator after it has cooled the engine.
While there, cool air passes over the tube matrix and takes away the heat. Afterwards, this cool antifreeze flows back into the engine to cool it down.
Inspect the radiator for any signs of leaks, corrosion, or mechanical damage. A damaged radiator can hinder heat dissipation, resulting in engine overheating.
3. Thermostat.
The thermostat reads the engine’s operating temperature and it ensures that there is an ideal temperature range for operation. Additionally, the thermostat controls antifreeze flow.
Its location between the engine and the radiator allows for blocking and releasing coolant flow. Hence allowing sufficient time for heat dissipation and engine cooling.
Test this temperature-sensitive valve to verify if it opens and closes properly. A malfunctioning thermostat may be stuck open or closed.
This can disrupt temperature regulation within the cooling system.
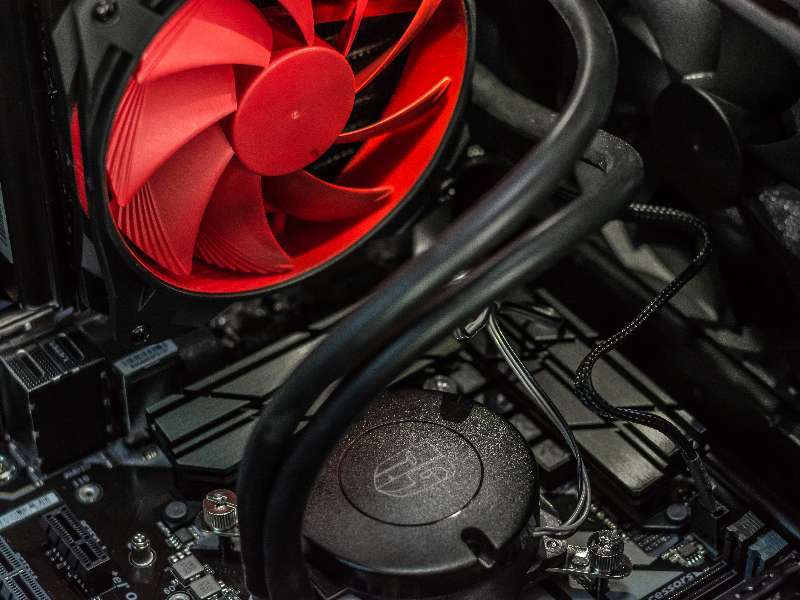
4. Water pump.
The water pump provides sufficient force for pushing the antifreeze through the entire cooling system and the engine. It is made up of components such as pulley, impeller and drive belt.
The condition of these areas is what you’re going to consider during your regular checks. Symptoms of a faulty water pump include leaks, overheating or unusual noises.
Maintaining a secure radiator cap seal.
A properly sealed radiator cap is crucial for the efficient functioning of your car’s cooling system. The radiator cap usually maintains the appropriate coolant pressure.
Furthermore, it prevents coolant leaks and overheating. Hence, ensuring your engine stays in good condition. Here are the steps to tighten or replace a faulty radiator cap:
- Check for signs of wear.
Radiator cap damage involves cracks or rust. Inspect it thoroughly to ensure that these issues are not present. However, if you notice any issues, replace it promptly.
- Ensure engine coolness.
Make sure the engine has cooled down completely before attempting to tighten or replace the cap. Because it is usually extremely hot and it can injure you.
Ensuring a complete drop in the engine temperature level will prevent any accidents due to hot coolant spraying out.
- Tighten the cap securely.
The solution for a loose radiator cap that’s still in good condition is simply tightening it. Use a cloth or towel to protect your hands from heat and turn the cap clockwise until it feels snug.
- Replace a faulty cap.
If you notice signs of damage, it’s best to replace the radiator cap altogether. Purchase a new one that matches your car’s specifications from an authorized dealer or auto parts store.
Cooling system flush step-by-step guide.
Regular cooling system maintenance includes a thorough flush. This is crucial for the longevity and performance of your vehicle’s engine.
Flushing ensures that your cooling system remains clean and efficient. Hence, preventing potential overheating issues down the line.
1. Prepare for the flush.
- Gather necessary tools and materials.
You will need a drain pan, new coolant (compatible with your vehicle), a funnel, gloves, safety goggles, and a hose.
- Park on level ground.
Ensure that your vehicle is parked securely on level ground before starting any work. Engage the parking brake to prevent any unexpected movement.
- Allow engine to cool.
Never attempt to work on a hot engine as it can lead to serious burns. Wait until the engine has cooled completely before performing this activity.
2. Locate the drain plug.
After the engine has cooled, find the radiator’s drain plug or petcock. It’s usually located at the bottom of the radiator at the front side of the engine. Place a drain pan underneath.
3. Drain the old coolant.
Carefully open the drain plug to avoid any damage to the seal which can compromise its performance. This will release the old coolant.
Allow it to flow into the drain pan. Examine the color of the coolant to determine whether you’re going to dispose or recycle the used coolant.
4. Flush the system.
This stage involves running water through the cooling system to remove any dirt, old coolant residue and contaminants. You could use a flush kit or garden hose to introduce clean water into the radiator.
Start your vehicle and let it idle while letting the old coolant to drain and the water to flow through the system. Do this continuously until the outflowing water is clear.
This indicates that the old coolant and debris have been removed. Turn off your engine and allow sufficient time for it to cool off.
5. Drain the radiator again.
This step involves removing the remaining water or radiator flush product from the radiator using the drain plug or petcock. Do this after the engine has cooled down while the radiator and reservoir caps are off.
6. Add new coolant.
The new coolant needs to have a perfect water-antifreeze ratio. Therefore, purchase one that’s already mixed or follow the instructions of the best ratio.
Close the radiator drain first before proceeding. Pour the coolant into the radiator. Do not close the radiator and reservoir caps.
7. Bleed the system.
Bleeding means that the air that got into the system is removed. Remove the radiator cap and allow the engine to run for 10 minutes or less.
This removes any air bubbles found in the system. Keep adding coolant while the engine runs until the recommended level.
8. Fill the reservoir and restore the cap.
Turn of the engine and let it cool down. After the coolant level reaches the recommended amount in the radiator, restore the cap.
Next, pour coolant into the reservoir. Make sure that you observe the recommended markings to ensure that you don’t add excess coolant.
Benefits of performing a cooling system flush.
- Removes contaminants.
Rust, debris, and other sediment accumulate within the cooling system over time. They hinder its ability to regulate temperature effectively.
Additionally, their accumulation contaminates the antifreeze mixture. Therefore, flushing the system helps remove these harmful contaminants as well as old coolant.
- Improves coolant flow.
A clean cooling system allows coolant to circulate freely. This enhances heat transfer, dissipation and prevents engine components from overheating.
- Extends lifespan.
It reduces the risk of costly repairs by keeping the entire cooling system in optimal condition. This also applies to preventing overheated damage to the engine.
Frequency and timing for cooling system maintenance.
Your car maintenance schedule is an important plan to follow as a preventive move. This ensures that you’re aware of potential issues and you take corrective action to stop the issues from happening.
The schedule shows activities to be performed according to either mileage accumulation or on a timely basis. Cooling system maintenance can assume both occasions.
Regular maintenance keeps your vehicle’s cooling system in optimal condition. Here are some key considerations regarding the frequency and timing of cooling system maintenance:
1. Recommended intervals.
Proper functioning of the cooling system components requires periodic attention from you. Here are the recommended intervals for essential maintenance tasks:
- Coolant replacement.
Most manufacturers recommend a 2 year window between the last and the next coolant replacement. However, this varies on the basis of driving habits, age of the engine and driving conditions.
- Hose inspection.
This helps to identify any signs of wear, leaks, or cracks. Since this is a visual activity, it shouldn’t take a long time window for you to perform it.
Therefore, take 6 months between the last and the next hose inspection. Alternatively, let this activity be done during routine service appointments.
- Flushing the cooling system.
Flushing the cooling system cleans it out by removing old coolant residue, dirt, scale and particle contaminants. The general recommendation is to perform this maintenance activity after every 2 years.
However, it all depends on how you use your vehicle. That’s why some car owners can afford to go for 5 years before a cooling system flush.
If you’re not sure about this, there are some recommendations on your owner’s manual.
- Thermostat and water pump.
These cooling system parts are essential for proper functionality. Therefore, they need attention between every 2 to 5 years.
However, regularly inspect them before the end of that time to identify any potential issues. This will help to prevent breakdown and it will save money spent on repairs.
2. Factors that may affect maintenance timing.
Several factors can influence when specific cooling system maintenance tasks should be performed. These include:
- Driving conditions.
The driving conditions refers to how you use your vehicle. For example, Frequent stop-and-go traffic and towing heavy loads.
Furthermore, it refers to the the environment in which you drive. For example, driving in dusty environments like deserts.
These conditions can accelerate wear on the cooling system components. Therefore, more regular inspections and maintenance might be required.
- Climate.
Climate varies from one region to another in the world. Extreme temperatures are either hot or cold. They can place additional strain on the cooling system.
Such climates, demand that you undertake more frequent checks and servicing of the cooling system components.
- Type of coolant.
There are many different types of coolants. The difference comes in regard to the type of technology used in their production.
Additionally, the chemicals used in making these antifreeze contribute to their differences. The type of coolant you use impacts the frequency of cooling system maintenance.
There are traditional coolants that require more frequent changes in comparison to long-life coolants or hybrid coolants. Your vehicle’s manual contains a recommendation of the coolant type to use.
3. Maintenance schedule based on vehicle age and mileage
Age and mileage are huge contributors when determining when certain cooling system maintenance tasks should be carried out.
Accumulated mileage changes the operating capacity of the cooling system. The rate at which your vehicle accumulates mileage affects the cooling ability of the antifreeze.
Because the rate at which the engine generates heat is determined by the rate of mileage accumulation. This can place more stress on the cooling system.
The consequences of neglecting cooling system maintenance.
Neglecting cooling system maintenance refers to the act of skipping important tasks in your maintenance efforts. This can cause severe consequences for your vehicle.
The risk of potential engine damage and increased chances of overheating and breakdowns increase when you neglect the cooling system.
Furthermore, it increases the costs of repairs required to fix the damage. Here are some of the key consequences that can arise from neglecting cooling system maintenance:
- Potential engine damage.
Lack of maintenance causes the formation of corrosion in the cooling system. This leads to the damage of its various components.
For example, the radiator, hoses, water pump, and thermostat. Failure of these parts lead to serious engine problems. Avoid such scenarios by taking care of you cooling system.
- Increased risk of overheating and breakdowns.
When there is no proper maintenance the cooling system fails at its primary function of regulating the engine temperature.
Since this system becomes less effective at dissipating heat. Therefore, the engine is more likely to overheat. This leads to breakdowns and expensive repairs from overheating damage.
- Costly auto repairs.
A neglected cooling systems experiences component damage due to corrosion and other issues. When this happens the damage also extends to the engine components.
Hence requiring extensive repairs. These repairs can include replacing components such as engine parts, radiators or water pumps, which can be quite expensive.
Benefits of regular cooling system maintenance.
Regular cooling system maintenance offers several key benefits for your vehicle’s engine. For example, it ensures an improvement in efficiency and lifespan longevity.
Furthermore, you can prevent costly repairs and enhance overall vehicle performance. Therefore, ensure that you prioritize the protection and care of your cooling system.
1. Improved engine efficiency and longevity.
When the cooling system is functioning optimally the engine operates at its ideal temperature. A cooling system that functions properly includes correct coolant levels, clean and functional components.
This contributes to efficient heat dissipation and reduces the risk of an overheated engine. Consistent monitoring and servicing of the cooling system extend the life of vital engine parts.
For example, gaskets, hoses, and radiator. Therefore, observe the best cooling system maintenance practices to enjoy this benefit.
2. Prevention of costly repairs.
Significant damage from neglecting cooling system maintenance leads to expensive repair requirements. For example, overheating damage causes warping or cracking in the engine block.
Hence leading to the need for extensive repairs or even replacement. Therefore, routine checks help identify potential issues early on.
This allows for timely interventions before they escalate into major problems.
3. Enhanced overall vehicle performance.
Consistent performance and dependability of your vehicle can be improved through a well-maintained cooling system.
Because this maintenance preventing overheating-related breakdowns. Furthermore, optimal operating temperatures promote fuel efficiency, saving you money at the pump.
Regular maintenance contributes to a smoother driving experience. This gives the driver peace of mind when going for a long distance drive.
4. Preventing overheating.
Engine temperatures need to be at a specific level for proper functionality and performance. That’s why when its too hot or too cold, the engine runs at a specific temperature.
There are coolants that are made to suit these climatic conditions. The cooling system regulates the engine’s temperature level.
Coolant changes and system inspections allow effective heat dissipation to prevent overheating. Additionally, performing these maintenance tasks regularly prevents potential engine damage.
5. Improved heater performance.
The heating ventilation and air conditioning (HVAC)system is part of the vehicle’s cooling system. Hot air from the heater core passes through the cabin filter to warm the car’s interior in cold weather.
Cooling system maintenance affects the vehicle’s heater core because the heater core functions on the basis of the engine’s temperatures.
As engine temperatures are regulated, the heater core can draw sufficient heat without straining the engine. Therefore, cooling system maintenance provides reliable cabin heating during cold weather.
6. Preventing corrosion and rust.
Corrosion and rust forms within the cooling system especially when the antifreeze mixture ratio is wrong. The mixture determines how effective the coolant regulates engine temperatures.
Furthermore, using old coolant for long causes corrosion and rust accumulation because it becomes acidic. Coolant change is a maintenance task that can prevent this from happening.
Corrosion and rust leads to damage in the radiator and other parts. Changing coolant helps to maintain proper coolant pH levels which prevents corrosion and rust.
7. Maintaining proper pressure levels.
Pressure level in the cooling system is essential in ensuring that the coolant reaches the necessary engine parts for temperature regulation.
Taking care of the radiator hoses, radiator cap, water pump and other parts helps to keep the cooling system operating under specific pressure conditions.
Maintains the right pressure, prevents coolant leaks and engine overheating issues.
Cooling system maintenance checklist.
In order to maintain optimal performance and prevent costly repairs down the line make sure you follow this checklist. It covers all the aspects of cooling system maintenance.
This reference guide will ensure that no parts and steps are missed during routine maintenance of your cooling system. Here’s what you need to do:
1. Clean the radiator fins.
The radiator fin is prone to the accumulation of dust, dirt, and debris. Accumulation for a long time tends to hinder airflow.
In order to clean the radiator fins, you need to special tools like compressed air and a soft brush. The compressed air removes the easy to remove dirt but the soft brush removes the stubborn dirt.
2. Test thermostat operation.
The thermostat is located between the radiator and the engine. It regulates coolant flow to and from the engine when the engine is running.
A malfunctioning thermostat disrupts the coolant flow rate. Furthermore, it gives the wrong temperature reading to the temperature gauge.
Test its functionality by monitoring engine temperature while the engine is in operation and replace if necessary.
3. Flush the radiator.
The radiator consists of network matrix of tubes whose function is to hold the hot coolant after it has flowed from the engine.
Coolant tends to collect a few debris during its circulation. Over time, these debris tend to accumulate within the radiator.
Hence reducing its efficiency and interrupting coolant flow. Flushing the radiator cleans out built-up sediment and improves cooling performance.
4. Inspect hoses and belts.
Hoses and belts are vulnerable to wear, cracks, or leaks through out their lifespan. Examining them helps you identify these issues early enough to prevent any potential problems.
After a visual inspection replace them if needed to avoid engine damage. Additionally, regular inspection also prevents coolant leakage and damage to cooling system parts.
5. Check coolant levels.
The coolant reservoir has markings that indicate the coolant level. These markings are either maximum or minimum.
When the coolant is at minimum level top it up and do not exceed the maximum level. Maintaining proper coolant levels helps prevent overheating and ensures efficient heat transfer.
Vehicle HVAC maintenance checklist.
The heating ventilation and air conditioning (HVAC) system is responsible for cabin temperature regulation. This system’s functionality is determined by the coolant conditions and the entire cooling system condition.
By following this HVAC maintenance checklist, you can help prolong the lifespan of your system and prevent costly repairs.
Importance of maintaining the HVAC system.
The HVAC system needs maintenance like every other vehicle component. This is essential for providing a conducive atmosphere within the cabin.
A well-maintained HVAC system ensures a comfortable indoor environment. It is capable of trapping and removing bad odor from the cabin to leave fresh air.
Regular maintenance helps identify potential issues before they escalate into major problems. For example, cleaning the cabin air filter prevents clogging.
A fully functional HVAC system reduces the stress level placed on the vehicle’s electrical system. Because air supply is made easier when the HVAC system works well.
Key components to inspect and maintain in the HVAC system.
The responsibility of the HVAC system is to offer cabin comfort regardless of the weather conditions outside.
Its components work together to provide heating, cooling, and fresh air circulation. You need to understand these components and know how to inspect and maintain them.
Pay attention to these key components:
1. Heater core.
It comes into action when you need to provide warm air in the cabin. Heater core maintenance involves ensuring it’s freedom from leaks or clogs.
Neglecting this maintenance leads to damage and operation interference. Meaning that it results in coolant leaks or a lack of heat in the cabin.
2. A/C compressor.
The functionality of the air conditioning system highly depends on the A/C compressor. Perform visual inspection of the compressor for optimal cooling performance.
3. Blower motor.
A HVAC system needs proper airflow in order to accomplish its tasks. The blower motor is responsible for controlling this airflow.
Blower motor maintenance involves cleaning and lubricating. This maintains a consistent air circulation.
4. Cabin air filters.
The level of air quality in the cabin is determined by the condition of the cabin air filters. Their responsibility is to trap dust, pollen, and contaminants to prevent them from entering the cabin.
Cleaning clogged and replacing worn out cabin air filters is how you ensure functionality and fresh air circulation.
5. Refrigerant levels.
There are occasions when the ac doesn’t blow cold air and this is a result of low refrigerant levels. To avoid inadequate cooling constantly monitor the refrigerant levels.
If these levels drop below the recommended point, refill the refrigerant. This is the HVAC system refrigerant maintenance requirement.
6. Hoses and connections.
Hoses are usually vulnerable to wear, leaks, or mechanical damage. A visual inspection will help you to identify these faults.
Afterwards take corrective action by either repairing or replacing the hoses. Hose connections tend to loosen up over time due to stress and pressure.
Reconnect any hoses that have been disconnected after assessing their condition. Additionally, ensure that there are no loose hose connections.
7. Thermostat.
The role of the thermostat in the HVAC system is similar to what it does in the engine cooling system. It detects temperatures and dictates the fan speed.
If the thermostat is faulty, it will give the wrong temperature reading. Hence negatively affecting the fan speed which interferes with airflow.
Tips for optimizing vehicle HVAC performance and efficiency.
Follow these tips to have a controlled cabin environment regardless of the weather. The heating ventilation and air conditioning (HVAC) system draws power from the battery when the engine is off.
However, it gets power directly from the engine when it’s running. Therefore, fuel efficiency is one benefit of a fully functional HVAC system.
Because a faulty HVAC system places more stress on the engine by demanding more energy which requires more fuel to burn. Furthermore, it provides a conducive cabin environment which improves your experience.
Follow these tips to maximize the performance and efficiency of your cooling system:
1. Regular maintenance.
This involves ensuring that the HVAC system parts are fully functional. It involves undertaking regular checks on parts like air filters, blower motor, and refrigerant levels to determine their state of operation.
Afterwards, if something is faulty within those parts, take immediate action to correct the situation. This will keep the system fully functional.
2. Cabin air filter replacement.
The role of the cabin air filter is to stop dust particles and contaminants from entering the passenger compartment.
The particles tend to accumulate over time and clog the filter. Therefore, cabin air filter replacement is one of the maintenance tasks at 100,000 mileage. However, this varies depending on its use over time.
4. Recirculate the air.
This is one of the settings found on the controls of your HVAC system. It is highly effective when you need to achieve a cool cabin atmosphere.
Set the system to recirculate the cool air in the cabin. It will first lower the temperatures and then start recycling that cool air.
Therefore, it won’t have to use more refrigerant. Once you’re comfortable with the cabin air is, switch to fresh air mode.
This will get rid of the air built up within the cabin since all the air was recirculating. New air will be introduced to make sure that you enjoy freshness.
5. Cleaning vents.
HVAC system ducts and vents tend to house some dust particles and contaminants. Cleaning them improves air flow and system efficiency.
6. Door and window seals.
When you ensure that these seals are in a good condition, it prevents air from escaping the passenger compartment. This also helps to prevent outside air from going into the cabin.
Regular inspection will help you to identify any broken seals. Take action to correct this situation as it helps maintain a consistent interior atmosphere.
Best time to replace the vehicle HVAC system.
The HVAC system deteriorates over time which interferes with the cabin comfort. At this point replacement is usually the best option.
It is important to know when your HVAC system is compromised. There are a few things that will point you to this decision of replacement.
Signs that indicate it’s time to replace a vehicle HVAC system.
1. Reduced cooling or heating.
Insufficient heating during cold weather and cooling in hot weather means that your HVAC system is faulty. This is an indication that it’s time for replacement.
2. Strange noises or odors.
Noises like rattling, hissing, or clicking when the HVAC system is running are an indication that something is wrong. This could be the motor which is responsible for air circulation.
Unpleasant odors when running the HVAC system are an indication that the vents, ducts and cabin air filter are clogged with contaminants. Therefore, pay close attention to this as a sign of time for a replacement.
3. Inconsistent airflow.
Inconsistent airflow refers to the flow rate or the wrong temperature level. It is a clear indication that you need to replace the HVAC system.
4. Frequent repairs.
A frequently repaired HVAC system is a money trap. Calculating the cumulative cost will suggest that it’s more economical to replace the system rather than performing repairs every now and then.
5. Age.
Like most mechanical parts and systems in your vehicle, the impact of age is their deterioration. The lifespan of most HVAC systems is between 7 and 15 years.
However, replacement after this duration depends on the level of decline in efficiency. The decline level is highly dependent on maintenance and use.
Factors to consider when determining the best time for replacement.
Your vehicle’s heating, ventilation, and air conditioning (HVAC) system requires replacement as soon as you notice any performance decline. However, some causes of that decline may not warrant replacement.
Those causes may need repairing while others will need replacement. Therefore, these are some of the factors to consider when determining the best time for a replacement.
1. Age.
The age of your vehicle is a critical factor of consideration that can determine when to replace the HVAC system. The older the system the higher the probability of performance problems and less efficiency.
A lot of manufacturers recommend that the HVAC system replacement should take place after the 7 year or 15 year mark.
2. Performance and efficiency.
While considering the performance and efficiency of the vehicle HVAC system, you should consider airflow rate, freshness and temperature levels.
A reduction in any of these key performance indicators is a clear sign that something needs to be done. However, before taking any action, first undertake an asseessment of the components.
Afterwards determine if a replacement is necessary or will a repair solve the problems. Whichever action you take should restore comfort and reliability.
3. Costs of repair and maintenance.
It makes no economic sense when you perform repairs back to back in order to maintain performance of the HVAC system. If this is the case replace the entire system since this will have a long lasting effect.
4. Energy and fuel efficiency.
The engine experiences increased stress when the HVAC system is not in a good condition. There are several reasons why the car consumes more fuel and a faulty HVAC system is one of them.
It draws energy from the engine when the engine is running and from the battery when the engine is shut. In both cases, this system will consume substantially large amounts of power when functioning.
Therefore, to reduce this effect, the car owner may undertake a full system replacement. Older systems tend to have lower efficiency ratings, leading to higher energy consumption. and increased utility costs.
5. Safety and comfort.
The HVAC system is capable of disrupting your comfort and safety. For example, when removing fog from a car window, the HVAC system is one of the sources of a solution.
Random formation of fog on the windshield and windows can also result from a faulty HVAC system. This disrupts your view and its a safety hazard.
Consider replacement when you observe this issue. It will boost comfort and facilitate safety improvements.
6. Technological advancements.
There are different model types of HVAC systems in the market. Their efficiency is highly affected by the technology used in their manufacture and operation performance.
Upgrading to a newer model allows you to take advantage of advanced features such as smart thermostats and zoning capabilities.
Vehicle HVAC system components also improve as technology advances. You can replace the entire system or just some parts to take advantage of new technology.