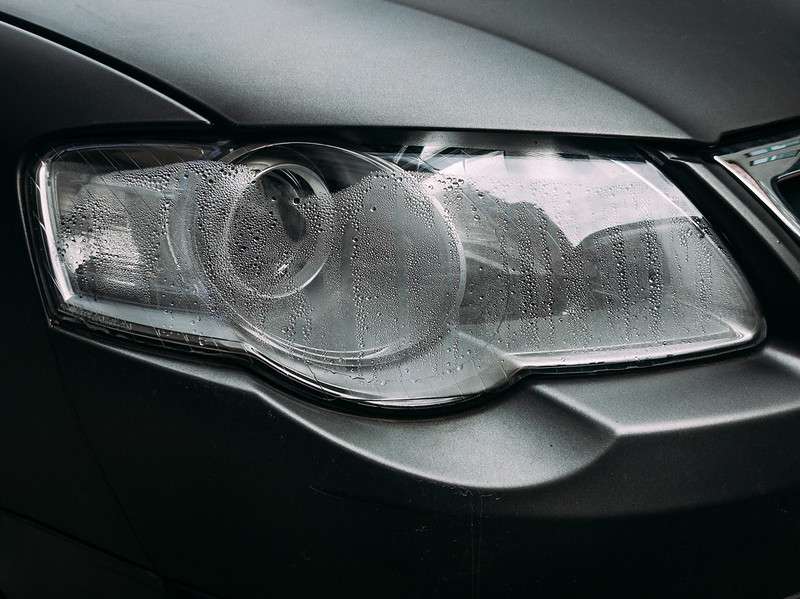
Taking care of the vehicle’s aesthetics may require you to know how to remove moisture from headlights. It may not be your car but you may have noticed that some car’s Headlights tend to accumulate moisture. Especially if the car has been serving the owner for sometime.
Moisture inside the headlights is a dangerous thing because it may short circuit the whole thing.
To be honest, this really messes up the car’s aesthetics. Since the type of Headlights that you install determines a car’s exterior appearance.
Further, moisture within the headlights makes it hard for the driver to see at night. In fact, moisture within the headlight is a major let down during vehicle inspection as well.
So, what happens when you spot the moisture? The next move will be moisture removal. Afterwards, you will need to undertake preventive measures to prevent the occurrence from taking place. This might require you to figure out what causes the moisture in the first place.
WHY DOES MY HEADLIGHT HAVE MOISTURE?
As per the way the car’s lights are made, there should be no penetration from external elements. Simply because they are completely sealed. But somehow moisture finds its way through. How is this possible?
Headlights Vent.
Because manufacturers are very clever they carter for almost everything, they developed a headlights vent. In this case, when they created a Headlights vent they considered bulb heating and cooling.
The different types of headlight bulbs heat up to provide lighting at different rates. Same applies when they’re cooling.
What happens during these processes is condensation within the different types of headlight housings. The function of a Headlights vent is to remove the condensation that forms as a result of the bulb’s heating and cooling.
Now if the vent is blocked due to an accumulation of elements, the moisture won’t get an escape route. This results to an accumulation of the moisture within the headlights housing.
SOLUTION.
Cleaning out the vent is something you can do without having to disassemble the entire headlight. A lot of things are capable of blocking this area including insects that fly towards the car’s light.
Remove the Headlights only if you cannot access the vent or if the contaminants have been pushed from the vent to the headlight assembly.
Headlights seal.
This will require an extensive investigation that may involve getting the headlights out of their socket. Afterwards, if you find that the sealing is out of order, it’s essential for you to undertake necessary repairs.
Which will be dependent on the extent of the damage. The whole headlight might need to be replaced or repairs could be done on the seal only. Repairs done on the seal require new sealing material and strong glue.
Solution.
This one becomes a bit tricky because it involves removing the headlights from the assembly. Simply because the headlights seal goes around the entire assembly. Secondly, you will need to closely examine the seal to check for cracks.
Wipe the seal entirely as well as inside the headlight housing. Then use a glue to put the broken parts together, or otherwise get a new rubber seal and glue it around the headlight.
If you make a mistake during this activity, the problem will still recur. So make sure you know what you’re doing and if not, consult a professional.
Damaged headlights.
This is a very easy problem to spot. Physical examination of the headlight’s condition will reveal a crack on the housing. There are diverse repairs that you could undertake for the headlight depending on the extent of the damage. Alternatively, you could replace the whole set-up.
HOW TO GET MOISTURE FROM HEADLIGHTS YOURSELF.
Remove the headlights assembly.
Remove the screws from the assembly using a ratchet. This releases the headlight assembly from its socket. Afterwards, just pull away gently.
Wipe off the build-up.
Removing the screws opens up the headlights and gives you access the moisture filled headlight housing. Using a lint-free cloth, just wipe off the moisture and clear the glass. Ensure you get every drop to restore the clear appearance.
Insert silica pack.
You might be thinking that this move will block light coming from the headlight bulb. It’s a genuine concern that can be addressed by ensuring that the silica packs are not in front of the bulbs. Because this silica pack is placed inside the headlight housing which also houses the bulb.
The silica pack is a preventive measure after the moisture finishes. It is effective in absorbing any new moisture that could enter the newly cleaned headlights.
Apply headlight sealant.
If you’ve ever undertaken this process before, it’s a safe move to ensure that no cracks are left around the headlights housing. Simply because the more times you remove headlights for cleaning, they become very loose around the frame. The new seal will stick everything in place until the next time you need to clean the moisture.
Re-construct the headlight.
Simply fit in the headlight set back into the socket. But before doing so, insert the screws into their right place so that they may hold the headlight assembly in place. Fix the screws in firmly and enjoy the headlight’s lighting capacity.
One thing to note before undertaking this DIY task, ensure that the battery is disconnected. Do this by removing the battery’s cables.


